Try Windows Home Server for 120 daysMicrosoft is giving Windows Home Server Installation DVD for free.
With Windows Home Server, you can back up all of your family’s PCs automatically. And you can connect, organize, and share your photos, videos, music, and other files with friends and family.
Order the free Windows Home Server 120-Day Evaluation Kit today. We will ship it to you free of charge.What will you receive?
Windows Home Server Installation DVD
Windows Home Server Connector CD
Home Computer Restore CD
To book your order click here.To know more about Windows Home Server visit this link.
Wednesday, August 20, 2008
Get Free Ubuntu CD Desktop and Edition Server Edition
Get a free copy of Ubuntu Desktop Edition and Ubuntu Server Edition. Ubuntu is available free of charge and you can get the latest version (8.04 LTS (Hardy Heron)) with no extra cost, but the delivery may take up to ten weeks, so you should consider downloading the CD image if you have a fast Internet connection.If interested you can request your copy hereNote : You have to register to their website before making any request. Click here to register yourself.
Orkut Keyboard Shortcuts
I would like to tell you that Orkut updated keyboard shortcut feature about 1 month ago. Here is a list of keyboard shortcuts with which you can open Scrapbook, Home Page, Communities, Friends, Profile simply with some keyboard shortcuts.Have a look :
alt + shift + s for Scrapbook
alt + shift + h for Home
alt + shift + c for Communities
alt + shift + b for Friends
alt + shift + p for Profile
alt + shift + l for LogoutWas this post useful ? Do reply !!
alt + shift + s for Scrapbook
alt + shift + h for Home
alt + shift + c for Communities
alt + shift + b for Friends
alt + shift + p for Profile
alt + shift + l for LogoutWas this post useful ? Do reply !!
How To Get Your Rapidshare Account Back If Scammed
This is a very important and a useful post by ShadowSwifter. Hackers always keep an eye on RS accounts, so if your account is scammed here is a working way to get it back.Note : This post is written by ShadowSwifter and I am just attempting to rewrite it in my own words.So lets start :As you get a Rapidshare Account note down all the following details of your account and save it in your computer.
Name*: ...
E-Mail*: ...
Login-ID*: ...
Transaction-ID*: ...
Date of account-creation: ...
Date of payment**: ...
If your account get scammed write an email to support@rapidshare.com telling about all the information of your account. Here is what ShadowSwifter provided for Rapidshare Technical Support to get his accounts back:1. Account name: Login ID and the aliases you've used2. Date of creation3. Date of thievery4. A copy of the LOGS (where the IPs are recorded) and tell RS which ones are friendly and get them to blacklist the hostile ones (which are most likely ones belonged to the scammer)5. Email used to create the account6. All emails that have been applied to the account7. Make a backup of all the links of the files uploaded to the account (use that extract link option)He further says that "Rapidshare asked us to give them a few links of uploaded content, I think they use them to track the account so its vital for you to have a clear record of what have been uploaded to your account and what their links are."8. Tell them the Number of files uploaded and the Total Size of the files uploaded. Simply copy paste the account status on your main menu.9. Tell them how many points you have got.10. Take screenshots of Your Main Menu, Your LOGS, Your OPTIONS.Tips:
Make sure your email is sincere. formal and honest. Don't be aggressive, they reply really fast and they are nice people.
Tell them a good reason why your account MUST be recovered.I am sure that tips will be quite useful for you.
Saturday, June 21, 2008
A Must Have Mozilla Firefox Addon : McAfee SiteAdvisor
Mozilla Firefox is the best internet browser I have ever used.Its add-ons facility makes it really a very secure browser.Its safe as well as very fast.
To make it more safer and secure here is a addon known as McAfee SiteAdvisor.This addon warns the user when he/she attempts to open any site that contains any virus or spyware.
Few features of this addon :
>>Rates email and IM links.
>>Actively shields PC from dangerous sites.
>>Quickly detects phishing and identity theft scams.
Downloading Instructions : Visit this website for the addon.
How To Speed Up Acrobat Reader : Just Like Notepad
People having less RAM faces problem when they open Acrobat Reader, it takes alot of time to open. So here is a tutorial to make your Acrobat Reader load faster like Notepad.
Lets start :
Go to the folder where Acrobat Reader is installed. By default it is located in C:\Program Files\Adobe
Now open Reader 8.0\Reader
Note: If you are using version 7 then you will have to open Reader7.0\Reader
In the Reader folder you will see alot of directories and the trick is just move all the files and folders from plug_ins directory to Optional directory.
Note : Do not copy , you have to cut all the files and folders. Keep in mind that while applying this trick your Acrobat Reader is not open, because if it is open you will get an error saying " The files your are trying to move is currently being used by another program".
Congrats you are done .. ) Now open Acrobat Reader and feel the difference in speed.
How to Change Screen Resolution and Display Colors Quality in Safe Mode of Windows
Whenever there is any system problem, especially the dread BSoD (Blue Screen of Death), most users first reaction is probably to go into Safe Mode to try to troubleshoot Windows. Safe Mode loads and starts just basis files and drivers necessary to run Windows.
Most drivers, including manufacturer’s driver to display adapter (graphic processing unit or accelerator GPU) is not been loaded. Thus, by default, Safe Mode normally has a screen resolution of just 800×600, causing a lot of components cannot be displayed and shown completely on screen, including the Start Menu and desktop icons, which has been realigned.
The worst part is that it seems like there is no way to change the any display settings such as desktop resolution and color quality at all. When user goes to Display Properties (in Windows XP) or Display Settings (in Windows Vista under Personalization), and try to change the screen resolution to higher resolution such as 1600×1200 or 1280×800 which is commonly used as native resolution in today’s modern LCD display panels, the Windows in Safe Mode simply does not respond to the OK or Apply button, and does not apply the change made.
Here’s a trick to change the screen resolution and color quality display settings in Safe Mode of Windows, with any registry hack or third party program.
Go to Display Properties (Windows XP) or Display Settings (Windows Vista) by right click on empty blank space on Desktop, then select Properties (Windows XP) or Personalize (Windows Vista).
Then change the resolution by sliding the Low to High slider bar. Do not press “OK” or “Apply” at this time. Instead, click on Advanced Settings, and then click OK. Windows in Safe Mode will change the screen resolution according to new settings, and prompt a “Monitor Settings” dialog box prompting that desktop has been reconfigured, with countdown timer. Click on Yes to keep the new settings.

Alternatively, simply click on Advanced, go to Adapter tab, then click on List All Mode. Select a mode with screen resolution size and color mode that you prefer, and click on OK. Windows will apply the new resolution size and color quality on Safe Mode too.
Friday, June 20, 2008
How To Watch Youtube Videos In High Quality
Today I am going to share a Youtube tip with you.Sometimes it is very annoying when you are watching any low quality video on Youtube.You are unable to read the text while watching any tutorial.So here is a very simple trick with which you can watch Youtube videos in high quality.
This will not boost up the quality but will surely increase it.So here is the simple trick.
When you are watching any just just add the following code to the end of the url
For example :
If the video url is http://www.youtube.com/watch?v=24qml1t3dZ0&feature=dir
Just add the code and your url will look like this :
http://www.youtube.com/watch?v=24qml1t3dZ0&feature=dir&fmt=18
or
http://www.youtube.com/watch?v=24qml1t3dZ0&feature=dir&fmt=6
Here is the proof :
Screenshot of original video :

click on the image to enlarge
Screenshot of video after applying the code :

click on the image to enlarge
The video will load slower but quality will definitely increase.Do not believe me ??Try it yourself and do comment here, is it working or not !!
Note : This trick will work on 90 percent of the Youtube videos.
This will not boost up the quality but will surely increase it.So here is the simple trick.
When you are watching any just just add the following code to the end of the url
&fmt=18
or
&fmt=6
For example :
If the video url is http://www.youtube.com/watch?v=24qml1t3dZ0&feature=dir
Just add the code and your url will look like this :
http://www.youtube.com/watch?v=24qml1t3dZ0&feature=dir&fmt=18
or
http://www.youtube.com/watch?v=24qml1t3dZ0&feature=dir&fmt=6
Here is the proof :
Screenshot of original video :

Screenshot of video after applying the code :

The video will load slower but quality will definitely increase.Do not believe me ??Try it yourself and do comment here, is it working or not !!
Note : This trick will work on 90 percent of the Youtube videos.
How To Include A Zip File Inside A Jpg Picture
This is a very interesting post for you all.In this tutorial I am going to tell you that how you can put a ZIP file inside a JPG image. Isn't that sounds interesting ?
So lets start :
1. Create a folder
2. Place your zip (for example a123.zip) file inside that folder and a jpg (for example test.jpg) picture you want to use.
3. Open command prompt and navigate to that folder
4. Type COPY /B test.jpg + a123.zip final.jpg
It will create a jpg file name final.jpg
And if you change its ending to .zip you can extract it and reveal the secret zip file.
That's it You are done !! Enjoy !
Antilag says : I just did some testing and I found out that if you upload this picture to a image host site and save it to your computer not through save picture as..
but download the picture with a download manager you can extract the zip file from the picture...
This means you can host zip files on image hosting sites.. :)
Here is an Example of this technique just download this with a download manager and open with WINRAR .
http://img212.imageshack.us/img212/5111/finalef0.jpg
Note : This is not my method, it is just a copy paste tutorial. Thanks to "Antilag" for this trick.
So lets start :
1. Create a folder
2. Place your zip (for example a123.zip) file inside that folder and a jpg (for example test.jpg) picture you want to use.
3. Open command prompt and navigate to that folder
4. Type COPY /B test.jpg + a123.zip final.jpg
It will create a jpg file name final.jpg
And if you change its ending to .zip you can extract it and reveal the secret zip file.
That's it You are done !! Enjoy !
Antilag says : I just did some testing and I found out that if you upload this picture to a image host site and save it to your computer not through save picture as..
but download the picture with a download manager you can extract the zip file from the picture...
This means you can host zip files on image hosting sites.. :)
Here is an Example of this technique just download this with a download manager and open with WINRAR .
http://img212.imageshack.us/img212/5111/finalef0.jpg
I Can't Change My Desktop Wallpaper
Yesterday I got a mail asking that "I can't change my desktop wallpaper !!". What can be the exact problem and what is the solution to it ??
About the problem :
There might be two reasons for it :
>>Active Desktop Problem
>>Registry Problem
So lets take these 2 issues one by one.
Active Desktop Problem : Active desktop is an option in Windows that allows users to add new features to desktop like adding a webpage to desktop and many more. This can be a major issue with which you cannot change your desktop wallpaper.
Registry Problem : An error can occur in your PC with which you cannot change your desktop wallpaper.
Here is the solution :
Just turn off your Active Desktop.If you do not know how to turn off see the tutorial below...
Right click on your Desktop and select "Properties". Now go to Desktop tab and select Customize Desktop.
A new Window will open, now select Web tab from top horizontal bar and uncheck all options and click OK.
Now you can change your desktop wallpaper. Yet problem is not solved ??
If you still cannot change your desktop wallpaper I am sure that it is a registry error caused by any of spyware or virus.
To fix the registry error do the following steps :
Open Registry Editor by going to Start and RUN and type REGEDIT and hit Enter.
A new window will open.This is known as Registry Editor. Now navigate to
HKEY_CURRENT_USER>>Software>>Microsoft>>Windows>>CurrentVersion>>Policies>>
System
Now in the right hand side panel look for Wallpaper select it and hit Delete from keyboard or right click on it and select Delete.
Close Registry Editor and reboot your PC now.
Congrats now can change your wallpaper.
How To Download Flash Files In Mozilla Firefox
Ever wanted to save flash movies in Mozilla Firefox without any extension. No ?? Then here is a trick for you all.
Whenever you visit a web page and wish to download any flash files you view its source code and then find the link to flash file and then download it. No need to follow such long procedure when you have a simple solution.
Just right click on a web page and select View Page Info.
A new window will pop up just click on Media tab above and select the swf file and click on Save As.
Just have look here :

click on the image to enlarge
Isn't that simple and useful.
Whenever you visit a web page and wish to download any flash files you view its source code and then find the link to flash file and then download it. No need to follow such long procedure when you have a simple solution.
Just right click on a web page and select View Page Info.
A new window will pop up just click on Media tab above and select the swf file and click on Save As.
Just have look here :

Isn't that simple and useful.
That is why I prefer Mozilla Firefox as it is secure and faster and gives many new features. You can download Mozilla Firefox from Right Sidebar.
Best Anti Virus, Anti Spyware, Firewall And Internet Browser
I am a regular visitor of Yahoo Answers and in the free time I help others in Computer & Internet section. I usually see people asking for which is the best anti virus ?? Which is the best firewall ?? Which is the best package I should use for Internet Security ?? and alot of questions regarding Internet Security.
In the month of March I wrote a post about Internet Secutiy Tips. In that post I told you about how you can remain secure from vunerable attacks of viruses,spywares etc.
But I get alot of mails asking me about best Internet Security package.
By Internet Security Package I mean combination of 4 secutity applications :
>>Anti Virus Program
>>Anti Spyware Program
>>Firewall Program
>>Internet Browser Program
I am writing this post from my own experience. Till now I have used almost all anti virus, firewalls, anti spyware, so in this post I am going to tell you the best 2 Internet security packages I have ever used. I have divided these 2 packages according to the users computer speed i.e amount of RAM user have.
So let start :
For users having RAM more than 512 mb :
Best Anti Virus : Kaspersky Anti Virus
Best Anti Spyware : Super Anti Spyware
Best Firewall : Comodo Firewall
Best Internet Browser : Mozilla Firefox ( You can download it from Right Sidebar )
For users having RAM less than 512 mb :
Best Anti Virus : Nod32 Anti Virus
Best Anti Virus : AVG Anti Virus or Super Anti Spyware
Best Firewall : Zone Alarm Firewall
Best Internet Browser : Mozilla Firefox ( You can download it from Right Sidebar )
I guarantee you that by installing these Internet security packages you will never face problem of viruses, spywares and all.
Sunday, June 8, 2008
Hidden Programs In Windows XP
Do Comment If you Like it...
Programs:
1. Private Character Editor :
Used for editing fonts,etc.
** start>>Run
** Now, type eudcedit
2. Dr. Watson :
This an inbuilt windows repairing software !
** start>>Run
** Now, type drwtsn32
3. Media Player 5.1 :
Even if you upgrade your Media Player, you can still access your old player in case the new one fails !!!
** start>>Run
** Now, type mplay32
4. iExpress :
Used to create Setups. You can create your own installers (.exe files)
** start>>Run
** Now, type iexpress
HIDDEN MUSIC
Microsoft Windows XP is playing a cool music during installation. It is a pleasant little tune that you’ve probably never heard, unless you were present when Windows was being installed on your PC. After that it’s never played again, unless you know where to look for it.
To hear what you’ve been missing, just follow these:
Make you way to
C:\WINDOWS\system32\oobe\images
and look for a file called "Title.wma" or possibly "Windows welcome music.wma".
CooL!!!
Login with multiple ids in google, yahoo, orkut etc
Do you maintain multiple Google Accounts? Solve that headache of logging in and out different accounts in Firefox by this trick. I feel life can get complicated if you operate more than one Google Account and have associated different Google services with different accounts.
For example I have two Gmail ID's. One tamag[at]gmail for my work and another gautam[at]gmail for personal use. I am a big fan of Firefox and each time I need to read mails, I am annoyed of logging in and out for different id's.
Well this trick has done wonders for me, Hope it works for you to.
step 0 :
- Download Firefox for more efficiency(optional).
Step 1:
- Open system "properties"(by right clicking my computer).
- Choose tab "advanced", click to "environment variables" button.
- In "system variables" section, click "new".
- Type this information to each textbox.
Step 2:
variable name: moz_no_remote (should be all small letter).
variable value: 1
Step 3:
- Open firefox icon’s properties (from desktop and quick launch).
- Add extension -p to command line(like “c:\program files\mozilla firefox\firefox.exe” -p).
- Press ok.
Monday, June 2, 2008
How to Hide the drives(c:,d:,e:,a:...etc) in My Computer
This is a great trick you can play on your friends. To disable the display of local or networked drives when
you click My Computer.
1. Go to start->run.
2. Type regedit. Now go to:
HKEY_CURRENT_USER\Software\Microsoft\Windows\CurrentVersion\Policies\Explorer
Now in the right pane create a new DWORD item and name it NoDrives(it is case sensitive). Now modify it's value
and set it to 3FFFFFF (Hexadecimal). Now restart your computer. So, now when you click on My Computer, no
drives will be shown(all gone...). To enable display of drives in My Computer, simply delete this DWORD item
that you created. Again restart your computer. You can now see all the drives again. Magic........lol....
CONVERT A 512 MB duo/produo/MMC CARD TO 640 MB
CONVERT A 512 MB duo/produo/MMC CARD TO 640 MB
I guess it works for duo/produo/mmc cards.
Principle:--Your files in duo/produo/MMC is stored in multiple (disk) blocks.
So if you format using 16K block, the space used will be 16K eventhough your file is just 1K.
If you buy DUO/PRO-DUO, it is usually preformatted with 16K block. Therefore a lot of space is wasted as most installed program files are usually less than 2K.
ProCeDure:--
You will need a card reader to do this:-
edit:you can also do it by connecting your phone via usb
1. Connect card reader and copy all your files in the memory card to computer disk.
(Make sure you set the show all/hidden/os files to "on")
2. Do a format of the memory card using command line "format" and use the /A=size option.
Alternative, you can use the Disk Management in Adminstrative Tools to format.
Make sure you select FAT16. For 256MB memory card, smallest block you can use is 4K, 128MB is 2K, 64Mb is 1K and 32MB is 512B.
(Note: You cannot use the phone "format ext.mem" to do this as the format just clear the allocation table and does not change the block size)
3. Copy back all files to memory card.
Now you will find that you will have more space.
I have installed many software to to my 256MB memory card and it is nearly full. After doing above, I got an "extra" 32MB.
For those who have problem with command line format::
Just use the Disk Managament to format
1. Goto Start->control Panel->Administrative Tools->Computer management->Disk management
2. Select your memory card/usb drive. Right-click and select "Format"
3. Select "FAT". Choose Allocation size. For 256Mb MMC select 4K, 128Mb MMC select 2K, 64Mb MMC select 1K and 32Mb MMC select 512B
Crack Multimedia Memory Card Password
Follow the Steps
1. Install the File explorer Software e.g. SELQ of Fileman through data Cable or Bluetooth in Phone memory
2. Then Insert The Blocked MMC
3. Open the File Explorer Software
4. goto C:\ i.e Phone Memory
5. goto System
6. Goto Find and Search MMCstore
7. Send this file by Bluetooth or Infrared to your PC
8. Rename the file MMCSTORE to MMCSTORE.TXT
9. Open the file and the password off the MMC are there
Done Enjoy
Discover Hidden Music in Windows XP
Did you know, there is a hidden music in Windows XP that you have never heard..
To hear this sound, first of all go to Folder Options and under the "View" tab, check "Show hidden files and folder".
Now navigate to the drive where Windows XP is installed. So if C:\ is the drive where Windows XP is installed, goto
C:\WINDOWS\system32\oobe\images
There you will find a file Title.wma. Open in with your favorite media player and listen to it.
Do comment...:)
Sunday, June 1, 2008
Brand windows with your name and add your own photo
Open notepad dump the following lines into it and save it with the name OEMINFO.INI in the c:\windows\system32 directory:
——————————————————————-
[General]
Manufacturer=Your Name Here
Model=Your Model Here
[Support Information]
Line1=Your Name Here
Line2=Your Address Here
Line3=Your Email Address Here
———————————————————————
1. Save the file as OEMINFO.INI in the c:\windows\system32.
2. Then make a right click on my computer select properties, in the general tab a button will be highlighted (support information) make a click on it, you will be able to see the changes.
3. Now if you want to display some more information then simply increase the line in the file.
ex: Line4=Your Working Hours Here
You can also add your logo or photo
Create a bmp file(Your Photo) and save it the System32 folder as “oemlogo.bmp”(Without Quote).
Increasing the Vista Activation Period to 120 days.
Normally you get a grace period of 30 days before Vista insists that you activate, online or over the phone. However you can increase the period by running this command:
slmgr.vbs -rearm
The trick is to run the above command, just before it expires, rather than 3 times all at once.
slmgr.vbs -rearm
The trick is to run the above command, just before it expires, rather than 3 times all at once.
Login with multiple ids at a time in GTalk or Google Talk
Hello Friends,As we all know about google talk, It is a messenger by Google and it is very light weight and easy to use. But we all also know that we can be online with only one one google id, But what if you want to online with multiple ids in Google Talk???Here is the way (trick) by which you can be online in multiple Google Talk instances and chat easily with anyone. Right click on your GTalk icon (On desktop) then select properties then just change Target value to
“C:\Program Files\Google\Google Talk\googletalk.exe” /nomutex
means add /nomutex at the end without commas then press ok. Now you will see that you can open multiple Google Talk instances.
If you like my posts then please comment on it...
“C:\Program Files\Google\Google Talk\googletalk.exe” /nomutex
means add /nomutex at the end without commas then press ok. Now you will see that you can open multiple Google Talk instances.
If you like my posts then please comment on it...
Block USB Devices
To this what can be done is that the USB can be blocked and then stopping the use of USB drives. Here is a simple registry hack to do so, try it with care.
1. Go to Start –> Run, type Regedit.
2. Go to HKEY_LOCAL_MACHINE\System\CurrentControlset\Services\USBStor
3. In the right pane, look for value Start and have value as 0000000(3)
4. Double click on that and change that value to 4.
You might be required to restart the PC, and then you are done with it, USB is now blocked.
In case if you want to get the USB unblocked, just change the value again to 3.
See, its so easy. Isn’t it
To Trace Original Email Sender
The purpose of this guide is to show the process involved in tracing an email. The first step required to tracing an email is finding out the headers of the email. What are headers? Email headers are lines added at the top of an email message that are used by servers as the email goes on route to get delivered. Generally email clients only show the standard To, From, and Subject headers, but there are more.
Enabling Email Headers For Gmail
Step 1:Once Logged into your Gmail Account open the Email whose headers you want to view. Click on the “More Options” link in the message next to the date of the email.
Step 2: Now click the “Show Original” link.
Step 3: This link will popup a new window the headers and the body of the message.
Enabling Email Headers For Hotmail
Step 1:Once logged in, click on the "Options" link in the upper navigation bar.
Step 2: Now click on the "Mail Display Settings" link.
Step 3: Change the "Message Headers" option to "Full" and click ok.
Step 4: Go to your inbox and open any one of your email. You emails show now contain additional headers.
Enabling Email Headers For Yahoo
Step 1:Once logged in, click on the "Options" link in the upper navigation bar.
Step 2: Now click on the "General Preferences" link.
Step 3: In the paragraph titled Messages and locate the "Headers" heading and select "All".
Step 4: Go to your inbox and open any one of your email. You emails show now contain additional headers.
Make your Invisible Yahoo friends visible..
Is your friend always hiding in Invisible mode? Do you want to check out what display image your friend is using eventhough he is offline? Then here is the perfect solution....
It is one of the very good site that I have came across, accurate all the time. All you have to do is to just enter your friends yahoo id and the site will display the rest. Your friends status and also his display image.
Visit the site Invisible Scanner
It is one of the very good site that I have came across, accurate all the time. All you have to do is to just enter your friends yahoo id and the site will display the rest. Your friends status and also his display image.
Visit the site Invisible Scanner
Knowing E-mail ID of any Orkut Profile
•Ignore the person of whom you want to know the Email id.
•Open your Gtalk of the same account as Orkut.
•Go to Settings -> Blocked
•You can see the ignored person's email id.
•Open your Gtalk of the same account as Orkut.
•Go to Settings -> Blocked
•You can see the ignored person's email id.
Monday, May 12, 2008
KB 940510 Windows Vista Activation Anti-Crack Detector Re-Released as Important Update for All Languages
Earlier this year, KB940510 was been released to both Windows Vista RTM (6000.16386) and SP1 (6001.18000) versions of system through Windows Update with designated status as important or critical. The release was meant only for system on English locale by then. And, the KB 940510 update is not compulsory, and user can easily hide the update to not installing the update, and not getting any notice to install it again in future.
KB940510 is the infamous anti-crack (or anti-hack or anti-exploit, whatever) that enables Windows Vista to detect activation exploits that bypass product activation and that interfere with usual Windows operation (this statement is in doubt though). However, KB940510 is able to detect only two type of Windows Vista activation crack, namely Paradox OEM BIOS Emulation activation crack and timerstop.sys (some installed via timestop.exe) Grace Timer Hack, both of which relies on a memory resident driver to bypass Windows Vista activation. Users have reported that Microsoft labels these cracks as SL07-001 and SL07-006. The more advance hardware level BIOS SLIC mod and Vista Loader (but you yourself can remove Vista Loader) boot loader level OEM BIOS emulation are left intact and working as before.
Since May 6, KB940510 is been released for all language locales except for the German locale, and in the process, also reset the “hidden” status previously set by English locale users in Windows Update to avoid KB940510 anti-crack detection update altogether. Microsoft rereleases KB940510 for English locale of Windows Vista too at the same time to target system that hasn’t been updated or chose to hide the update. Thus, those who have previously hide the Update for Windows Vista (KB940510) will again see the update been offered for download and install.


Microsoft description on KB940510.
Again, KB940510 crack detector, although marks as important critical update and will automatically install on system with Automatic Update enabled, is not compulsory albeit the re-release. User can still opt to hide the update to avoid installing it now and in future.

KB940510 cannot be uninstall, remove or rollback officially once installed. So it’s either you don’t install it, or you reinstall Windows Vista to skip and update. But don’t worry too much, the crack/exploit detector doesn’t remove the detected hack or exploit by itself.
0X80070002 License Check Failure and Unable to Logon Error After Installing Windows XP SP3
After installing Windows XP Service Pack 3 (SP3), the system may encounter an error code 0×80070002 that saying “A problem is preventing Windows from accurately checking the license for this computer.” The computer boots up and log on to desktop, but the error dialog pops up. Cancel the dialog will log off user. Attempt to login will fail again and logout. The process repeats endlessly in loop, and users cannot access the desktop. The only thing user can do is to restart the computer.
To recover from the unable to logon to desktop due to failure to checking the license error after installing Windows XP SP3, there is various solutions available. If the solutions suggested not working, try one of the following resolutions to fix the error.
Boot up to Safe Mode (by pressing F8 during initial startup), then copy the oembios.bi_ and expand.exe from the Windows XP installation CD (locate both files in i386 folder) to local hard disk, such as C:\ drive. Then open a command prompt window (Cmd), and run the following command to expand or unpack the compressed file:
expand oembios.bi_ oembios.bin
Alternatively, use WinRAR to extract oembios.bin from oembios.bi_ if expand command fails. Then, copy the the oembios.bin to C:\Windows\System32 folder (replace C to your system drive letter if applicable). Restart the computer.
If the above method fails to fix the problem, or you can’t find oembios.bi_ on your retail Windows XP setup CD, try to uninstall the Windows XP SP3 to revert back to error-free Windows XP SP2 which working properly. To uninstall Windows XP SP3 manually, restart computer and go into Safe Mode (press F8 on system startup), then run the following command in the Run command box or command prompt window:
C:\WINDOWS\$NtservicePackUnistall$\spuninst\spuninst.exe
Alternatively, go to Folder Options’s View tab to uncheck the option to hide protected system files. Then manually traverse the folder tree above, and double click on spuninst.exe to start uninstallation process of Windows XP SP3. After able to boot into XP desktop, you may want to fix the issue before reinstalling again.
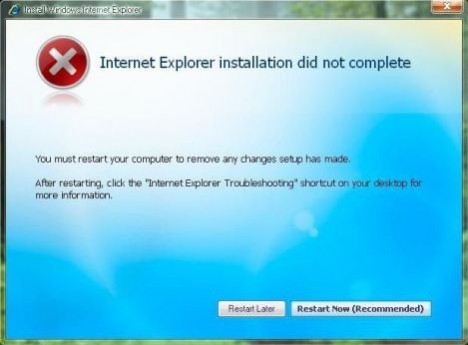
IE7 Installation Did Not Complete or Fail in Windows XP SP3
After installing Windows XP SP3, which does not include upgrade to the Internet Explorer 7 web browser, so users who haven’t upgrade to IE7 will still have IE6 on the computer. However, when user download IE7 setup install and try to install the new version of Internet Explorer 7 for Windows XP SP3 on system running Windows XP SP3, the installation process may fail and user cannot install IE7 on Windows XP SP3 computer successfully.
At the error, IE 7 setup installer prompts “Internet Explorer installation did not complete”, and requires user to restart the computer to remove any change setup has made. After reboot, as expected, it’s stil IE6.0 intact.
There is possibility that the IE7 setup installer downloadable from Microsoft Download Center does not support Service Pack 3, as it’s it’s labeled as for Windows XP SP2 only. However, some users have managed to install IE7 successful with IE7 for Windows XP SP3 build of setup package.
The resolution to the IE 7 cannot be installed on system running Windows XP SP3 is to ensure that you have downloaded the latest version of IE7 setup package. IE7 has two known released builds. One is build version 7.0.5730.11 released on end of 2006, while the newer one released on 2007 has build version 7.0.5730.13. Ensure that the setup installer for IE7 is for the later build version. In any case, this won’t be big problem if you just download the IE7 setup executable from Microsoft directly.
If the build version for the Internet Explorer 7 is correct and valid, then the next possible reason that causes failing of IE7 installation process is, ironically, Windows Genuine Advantage Validation Tool (or KB892130). Some reports that if WGA Validation Tool is installed, the IE7 installation will fail. So for those who intend to install IE7 after installing SP3, avoid WGA Validation Tool, or install IE7 first. For those who already installed WGA Validation Tool and fails to install IE7, reinstall Windows XP SP3 (or Windows XP SP1 or SP2 and upgrade to SP3) is the only alternative, as Microsoft doesn’t provide uninstallation option for KB892130.
Note: Microsoft has published IE7 for Windows XP SP3 through Windows Update. Try to download and install through WU to get your IE7.
But if you choose to reinstall, it’s best to upgrade to Internet Explorer 7 before installing Service Pack 3 to ensure that the upgrade is trouble-free. And this is so far the most recommended workaround to have IE7 on Windows XP SP3 for those who willing to fresh clean install Windows XP.


Restore Missing or Disappeared IE (Internet Explorer) Desktop Icon in Windows XP SP3
In Windows XP SP3 system, no matter it’s been upgraded from Windows XP with no service pack, SP1 or SP2 with XP SP3 standalone update package or Windows/Microsoft/Automatic Update, or user clean install from scratch with an integrated Windows XP with SP3 CD ISO image, the special desktop icon of Internet Explorer (IE) browser on desktop has gone missing. The IE desktop icon is different from normal IE shortcut, where IE desktop icon is special shell shortcut that provides quick access to Internet Options, and has shorter right click contextual menu.
Previously, Windows XP user has an option whether to turn or off (display or not display) the IE icon on desktop, by going to Control Panel -> Display -> Desktop -> Customize Desktop, and enable or disable Internet Explorer under Desktop Items section, or right click on Desktop, and then go to Properties -> Desktop -> Customize Desktop, and tick or untick Internet Explorer in Desktop Items section.
Internet Explorer in Desktop Items
In Windows XP SP3, the Internet Explorer option under the Desktop Icons section is missing, or disappeared. In fact, this is not a bug and is by design, probably due to anti-trust litigation settlement which requires Microsoft to disintegrate IE from operating system so that other web browsers can compete freely with IE6, IE7 or even IE8 in future. As such, IE desktop icon no longer exists and the ability to display IE desktop icon by selecting option in Control Panel’s Desktop Items customization has also been removed from Windows XP on SP3 (actually it has been removed previously from Windows XP SP2 or earlier when user install hotfix updates or IE7, but there is trick to restore the IE desktop icon, which continue to applied now). The behavior of Internet Explorer 7, which is bundled with Windows Vista is also the same.
IE Desktop Icon Not Showing in Windows XP SP3


User can always re-create a normal shortcut to Internet Explorer browser to place on desktop. But as mentioned, the shortcut created will be the normal type with an arrow on the bottom left corner, has plenty more right click context menu items, and when select “Properties”, it’s shortcut properties that is been opened, and not Internet Options in the case of IE desktop icon.
To restore and re-display Internet Explorer desktop icon item in Windows XP SP3, simply download reset_ie_icon.zip and extract reset_ie_icon.reg from the .zip archive. Then double click on reset_ie_icon.reg to execute it and apply the necessary registry keys into system registry to bring back the IE desktop icon. The registry files supports Windows XP SP3 user who uses new Start Menu style and will fix also issue related to Local Policy restricts IE desktop item from displaying.
If you prefer to resolve the issue manually, perform the following:
1. Click Start, Run.
2. Type regedit.exe.
3. Navigate to the following registry key:
HKEY_CURRENT_USER\Software\Microsoft\Windows\CurrentVersion\Explorer\
HideDesktopIcons\NewStartPanel (wrapped for easy reading)
Note: If HideDesktopIcons and NewStartPanel do not exist, create new registry keys for them.
4. In the right hand pane, double-click {871C5380-42A0-1069-A2EA-08002B30309D} key.
If the registry value name does not exist, create a new DWORD value and name it as {871C5380-42A0-1069-A2EA-08002B30309D}
5. Enter dword value data as 0 to enable the Internet Explorer icon on the Desktop.
For user who’re using Classic Start Menu, replace NewStartPanel with ClassicStartMenu instead so that the registry key location is as follow:
HKEY_CURRENT_USER\Software\Microsoft\Windows\CurrentVersion\
Explorer\HideDesktopIcons\ClassicStartMenu (wrapped for easy reading)
Other steps are exactly the same with the above. Refresh the desktop after change to display the IE desktop icon.
Previously, Windows XP user has an option whether to turn or off (display or not display) the IE icon on desktop, by going to Control Panel -> Display -> Desktop -> Customize Desktop, and enable or disable Internet Explorer under Desktop Items section, or right click on Desktop, and then go to Properties -> Desktop -> Customize Desktop, and tick or untick Internet Explorer in Desktop Items section.
Internet Explorer in Desktop Items
In Windows XP SP3, the Internet Explorer option under the Desktop Icons section is missing, or disappeared. In fact, this is not a bug and is by design, probably due to anti-trust litigation settlement which requires Microsoft to disintegrate IE from operating system so that other web browsers can compete freely with IE6, IE7 or even IE8 in future. As such, IE desktop icon no longer exists and the ability to display IE desktop icon by selecting option in Control Panel’s Desktop Items customization has also been removed from Windows XP on SP3 (actually it has been removed previously from Windows XP SP2 or earlier when user install hotfix updates or IE7, but there is trick to restore the IE desktop icon, which continue to applied now). The behavior of Internet Explorer 7, which is bundled with Windows Vista is also the same.
IE Desktop Icon Not Showing in Windows XP SP3
User can always re-create a normal shortcut to Internet Explorer browser to place on desktop. But as mentioned, the shortcut created will be the normal type with an arrow on the bottom left corner, has plenty more right click context menu items, and when select “Properties”, it’s shortcut properties that is been opened, and not Internet Options in the case of IE desktop icon.
To restore and re-display Internet Explorer desktop icon item in Windows XP SP3, simply download reset_ie_icon.zip and extract reset_ie_icon.reg from the .zip archive. Then double click on reset_ie_icon.reg to execute it and apply the necessary registry keys into system registry to bring back the IE desktop icon. The registry files supports Windows XP SP3 user who uses new Start Menu style and will fix also issue related to Local Policy restricts IE desktop item from displaying.
If you prefer to resolve the issue manually, perform the following:
1. Click Start, Run.
2. Type regedit.exe.
3. Navigate to the following registry key:
HKEY_CURRENT_USER\Software\Microsoft\Windows\CurrentVersion\Explorer\
HideDesktopIcons\NewStartPanel (wrapped for easy reading)
Note: If HideDesktopIcons and NewStartPanel do not exist, create new registry keys for them.
4. In the right hand pane, double-click {871C5380-42A0-1069-A2EA-08002B30309D} key.
If the registry value name does not exist, create a new DWORD value and name it as {871C5380-42A0-1069-A2EA-08002B30309D}
5. Enter dword value data as 0 to enable the Internet Explorer icon on the Desktop.
For user who’re using Classic Start Menu, replace NewStartPanel with ClassicStartMenu instead so that the registry key location is as follow:
HKEY_CURRENT_USER\Software\Microsoft\Windows\CurrentVersion\
Explorer\HideDesktopIcons\ClassicStartMenu (wrapped for easy reading)
Other steps are exactly the same with the above. Refresh the desktop after change to display the IE desktop icon.
Restore or Fix Missing Accessories Shortcuts in Start Menu
I usually ask my clients to run disk defragmenter at least once a month to reduce the amount of fragmentation in file systems in order to keep disk access speed from degrading. I told them they could easily run Disk Defragmenter from Start > Programs > Accessories > System Tools > Disk Defragmenter. One of them got back to me saying that there’s no Accessories folder at the Start Menu!

The Accessories group shortcut in Start Menu is the easiest way for any computer user to access Windows built-in utilities such as Disk Cleanup, Disk Defragmenter, Backup, Scheduled Tasks, Synchronize and etc. Those tools are only shortcut mostly pointing to executable files in Windows System32 directory. Since it is only a shortcut, I am not surprised that it can be accidentally deleted or removed from Start Menu.
There are 2 ways I know that can easily restore back the Accessories group to Start Menu.
First logical way is to copy the whole Accessories folder from another computer and paste it to the computer that is missing of the Accessories folder. It’d normally work because the shortcut points to environment variable path such as %SystemRoot%\system32 instead of C:\Windows\system32. So even if the Windows is installed in D:\ drive, it’d still work.Second method is using a small and simple tool created by Ramesh Srinivasan to restore accessories group.

Monday, May 5, 2008
Unable to view Hidden files
If you are not able to view hidden files and folder even after enabling show hidden files and folders in folder options .. follow these steps..
Open the registry editor (Click on Start then run and type regedit press enter )..Now you will see a new window on the left pane Navigate to the following path
HKEY_LOCAL_MACHINE\SOFTWARE\Microsoft\Windows\CurrentVersion\explorer\Advanced\Folder\Hidden
Under this key, you’ll see 2 more keys “NOHIDDEN” and “SHOWALL“. Make sure that the values of “CheckedValue” and “DefaultValue” in right-side pane are “2” and “2” for “NOHIDDEN” and “1” and “2” for “SHOWALL” respectively. If it has some other value change it..Now check whether you are able to hide or unhide..
If this doesnt work try this..Navigate to
HKEY_CURRENT_USER\Software\Microsoft\Windows\CurrentVersion\Explorer\Advanced
In right-side pane, change value of "Hidden" to:
1 - To show hidden files
2 - To not show hidden files
Open the registry editor (Click on Start then run and type regedit press enter )..Now you will see a new window on the left pane Navigate to the following path
HKEY_LOCAL_MACHINE\SOFTWARE\Microsoft\Wi
Under this key, you’ll see 2 more keys “NOHIDDEN” and “SHOWALL“. Make sure that the values of “CheckedValue” and “DefaultValue” in right-side pane are “2” and “2” for “NOHIDDEN” and “1” and “2” for “SHOWALL” respectively. If it has some other value change it..Now check whether you are able to hide or unhide..
If this doesnt work try this..Navigate to
HKEY_CURRENT_USER\Software\Microsoft\Win
In right-side pane, change value of "Hidden" to:
1 - To show hidden files
2 - To not show hidden files
Some One Created Your Fake Profile - How to Get it Removed?
Some Created My Fake Profile - What to Do?
It is not a tough job to get a fake profile removed from orkut. The simplest step which would do is to scan and send your identity card to orkut staff. Use this form. You may also like to put additional pressure on orkut staff and the fake profile maker by following these below stated instructions to get the result quickly in your favor
click here to read the whole post
This article is taken from OrkutPlus
Best sites to learn photoshop online
Best sites to learn photoshopping online :
http://www.thewebmachine.com/
http://www.good-tutorials.com/
http://www.stridingstudio.com/tutorials/
http://www.computerarts.co.uk/tutorials/2d/
http://www.deepspaceweb.com/
http://www.phong.com/tutorials/
http://www.spoono.com/tutorials/photoshop/
http://www.eyewire.com/tips/photoshop/
http://www.spyroteknik.com/
http://www.dubtastic.com/
http://www.designsbymark.com
http://www.effectlab.com/
http://www.jlswebsource.com/tutorials.html
http://www.designsbymark.com/
http://www.eyeball-design.com/page09.htm
http://www.absolutecross.com/tutorials/photoshop.htm
http://www.myjanee.com/jnetuts.htm
http://www.eyesondesign.net/pshop/tuts.htm
http://www.photoshopcafe.com
http://www.planetphotoshop.com/tutorials.html
http://www.pankpages.com/
http://www.stewartstudio.com/tips/phototip.htm
http://www.aqa-d.se/
http://graphicssoft.about.com/cs/
http://www.rtideas.com/ticks/
http://www.screaming-art.com/tutorials.php
http://www.digitaltropic.com/tutorials.htm
http://www.perfectpixels.com/index.cfm?method=photoshop
http://www.distortion.co.uk/freebies/tutorial.html
http://www.arraich.com/ps_intro.htm
http://www.teamphotoshop.com/
http://www.eyeland.com/tutorials.php
http://user.fundy.net/morris/main.html
http://umojan99.tripod.com/
http://www.webteknique.com/
http://www.nebulus.org
http://www.wastedyouth.org/tutorials/
http://www.tutorialforums.com/index
http://www.dreaminfinity.com/tutorials.php
http://photoshop-tutopia.com/
http://www.tutorialzone.org/
http://www.phong.com/
http://www.tutorialized.com/
http://www.pixel2life.com/
http://www.lynda.com/
http://www.lethalmedia.net/
http://www.guildinn.com/
http://www.tutorialized.com/
http://www.chasm-online.com/forums/
http://www.opticsecurity.net/
http://www.pstuts.co.sr/
Friday, May 2, 2008
Download Free EA Sports FIFA 08 Game for Nokia Nseries Mobile Phone
N-Gage (or N-Gage 2.0 Next Gen application of Ovi initiative) is the mobile gaming service platform from Nokia that is available for selected Nseries S60 smartphones such as Nokia N81, N81 8GB, N82, N95 and N95 8GB. N-Gage is now giving away free EA Sports FIFA 08 mobile game, and it’s the complete version of the popular football or soccer game in the world, which normally costs 10 Euro or 8 GBP pound.

To receive the free EA Sports FIFA08, users have to own a supported Nokia Nseries phone, and must download and install N-Gage application on the mobile phone device to make it a gaming phone too. There are two ways to get N-Gage application. Firstly, download from play.n-gage.com and then transfer and install the program to Nokia Nseries device with a USB data cable.
The alternative method is to open mobile browser and browse to n-gage.mobi/play, and then click on Download N-Gage Now. Note that N-Gage application is about 10 MB in size, so make sure that you’re using unlimited and flat rate Internet GPRS or 3G data plan, or use WiFi Wireless LAN to download directly to mobile phone. If you’re using this method to install N-Gage applicaiton, the full FIFA08 game is automatically installed.
For users who already have N-Gage application installed, or install via web download, the full game of FIFA08 can be downloaded from here free of charge, which can be installed via PC Suite Mode or Mass Storage Mode for users who do not install Nokia PC Suite.
After installing EA Sports FIFA 08, gamers have to activate the free game with respective phone number, where a download link to the license will be sent to the phone, which once installed, will activate the full free FIFA08 soccer game for free.
ReadyBoost Not Working or USB Flash Key Stick Not Support or Enabled In Windows Vista SP1
ReadyBoost in Windows Vista uses a USB flash drive such as USB key or memory stick as additional memory to the operating system to boost system performance. However, after installing or upgrading to Windows Vista SP1 (and even in Windows Vista RTM), the ReadyBoost may stop working and no longer functioning, or saying that the USB flash key drive is poor in performance to run ReadyBoost.
The symptom is that when a USB flash drive is inserted and connected, Windows Vista is still able to properly detect the USB flash drive inserted, and gives an option to let user decide whether to run ReadyBoost on the drive. However, after evaluating the read/write IO speed of the USB flash key, Windows Vista judges that the USB memory stick is not good enough to use as ReadyBoost device, as the poor speed of the drive won’t improve any performance. The unsupported USB Flash storage device include even the premium quality (and priced) faster ReadyBoost approved USB key, and the USB drive can be used and work properly before upgrading to Windows Vista SP1.
The error in speed detection is probably due to USB problem facing Windows Vista SP1, which may have installed efficient USB drivers. As a workaround, the USB ReadyBoost key not recognized in Windows Vista SP1 (or Windows Vista RTM) issue can be fixed and resolved by tweaking the registry to force Windows Vista to recognize the USB flash drive as a valid ReadyBoost enabled device.
Firstly, format the USB flash drive to a clean state. Then run Registry Editor (regedit), and navigate to the following registry key:
HKEY_LOCAL_MACHINE\SOFTWARE\Microsoft\Windows NT\CurrentVersion\EMDMgmt
There are a few branch keys (similar to sub-folders under EMDMgmt) available, which has the format similar to
_??_USBSTOR#Disk&Ven_Imation&Prod_Flash_Drive&Rev_1.20#83b27965024423&0#{53f56307-b6bf-11d0-94f2-00a0c91efb8b}_1453414791
Delete all this registry keys (folders) away. These registry sub-key values store characteristics and various information or settings about each and every USB mass storage devices connected to the computer, including portable hard disk, external HDD, memory card, USB memory stick and Flash key.
After deleting, re-insert the flash memory stick. If Windows Vista still unable to enable ReadyBoost feature on USB key drive that supposedly support Ready Boost, perform the following trick.
Re-open Registry Editor if you have closed it, and then navigate to the same registry key again:
HKEY_LOCAL_MACHINE\SOFTWARE\Microsoft\Windows NT\CurrentVersion\EMDMgmt
There should be a new registry sub-key created for the USB memory stick just inserted. Go to the new sub-key, and change the following registry values in the right pane to the following settings:
"CacheSizeInMB"=dword:000003c0
"CacheStatus"=dword:00000001
"DeviceStatus"=dword:00000002
If the registry value name is not found, create a new DWORD (32-bit) Value and named it accordingly.
Close Registry Editor. The USB flash key is now recognized as ReadyBoost enabled. Right click on the USB memory stick drive in “Computer” to select “Properties”. Then go to the ReadyBoost tab and set the cache size and verify that ReadyBoost is working on the drive.
Subscribe to:
Posts (Atom)

